Here’s a handy list of common nail drill bit uses:
Prep: Remove excess cuticles carefully using flame or diamond bits.

Shape: Choose barrel or mandrel bits for general nail shaping.
Smooth: Utilize ceramic bits for a smooth, finished nail surface.
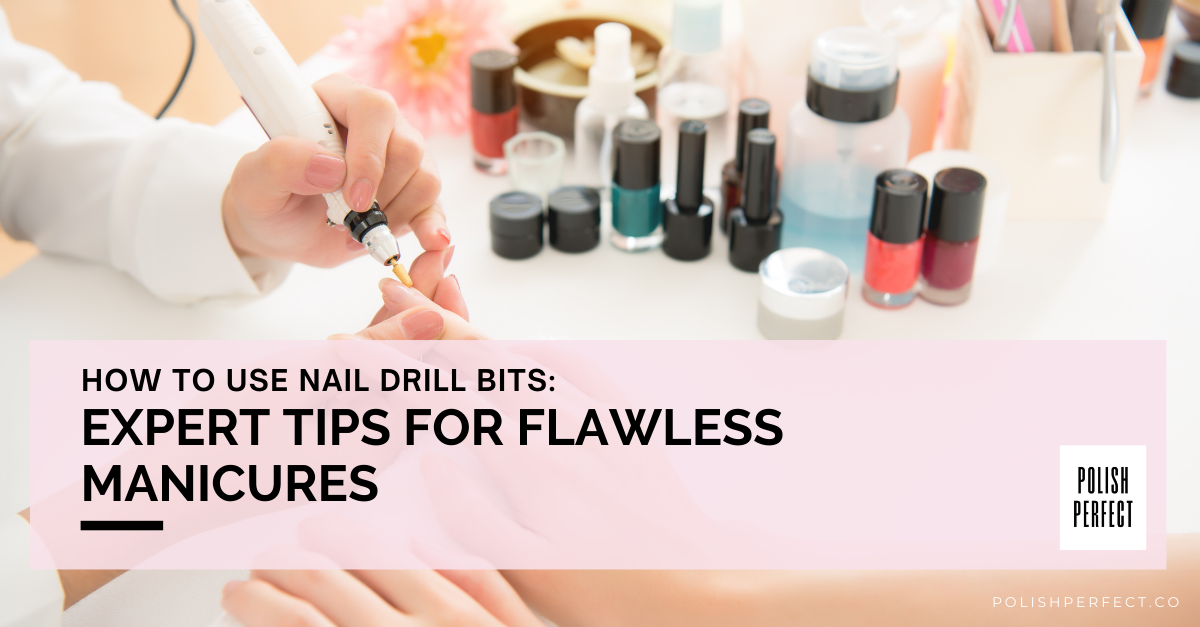
Discover how to use nail drill bits for salon-quality manicures at home.
From shaping to buffing, these versatile tools are essential for perfecting your nail care routine. Find the best nail drill for beginners and learn the specific uses of different bits.
Get ready to learn how to use nail drill bits for efficient, expert-level results.
Let’s dive in!
Understanding Nail Drill Bits
As a nail technician, it’s essential to understand the basics of nail drill bits and how to use them effectively.
What Nail Drill Bits Are Made Of?
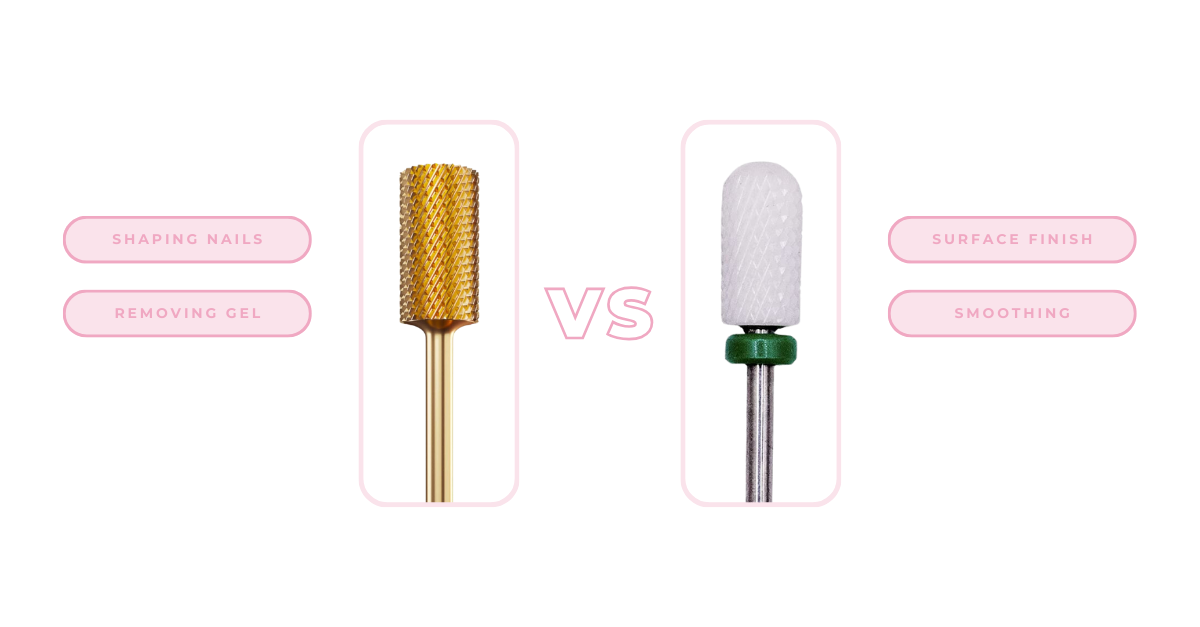
There are various materials for nail drill bits, such as carbide, ceramic, and diamond. Each material has its unique benefits and applications.
For instance, carbide bits are ideal for shaping nails, removing gel polish, and working on acrylics. Ceramic bits are perfect for smoothing and finishing the nail surface, while diamond bits are excellent for delicate cuticle work.
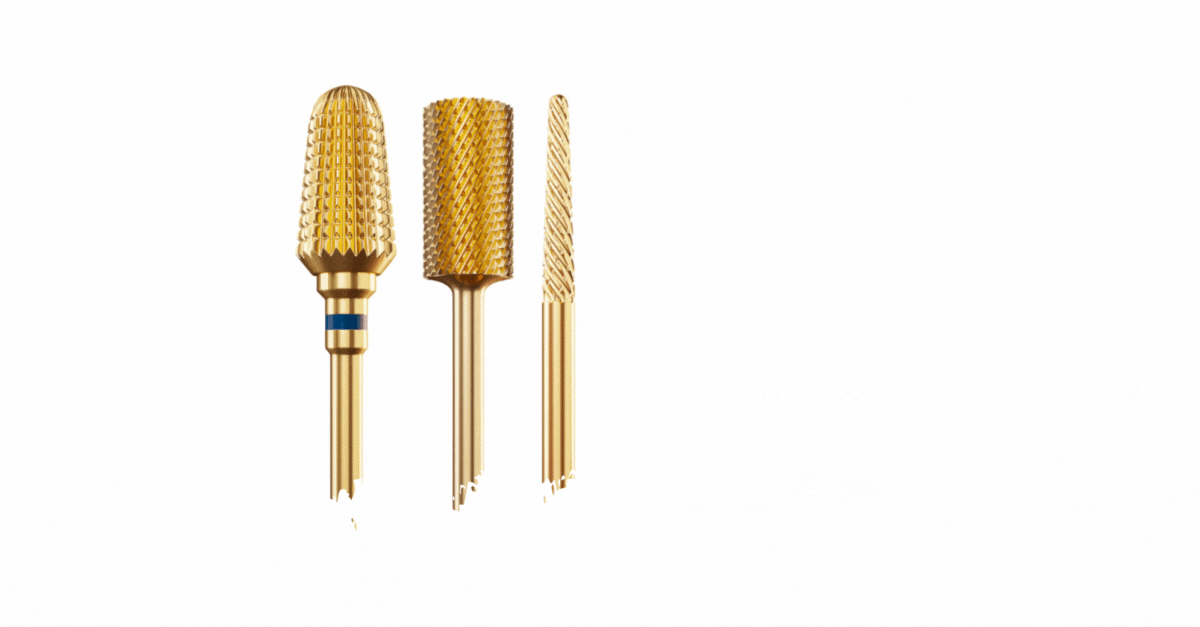
Shapes of Nail Drill Bits
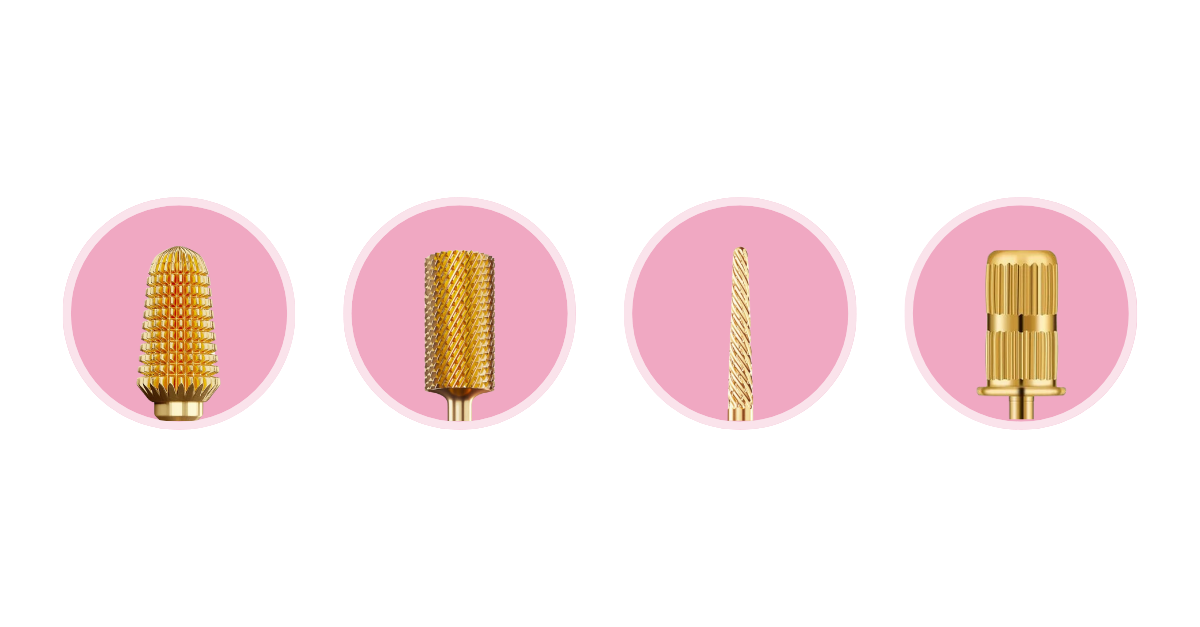
Additionally, nail drill bits come in different shapes like barrel bits, safety bits, flame bits, and mandrel bits. Here’s a brief overview of each shape:
- Barrel bits: These versatile bits work well for general nail preparation, shaping, and surface work. Their cylindrical shape makes them a popular choice.
- Safety bits: With a rounded and smooth tip, safety bits prevent accidental cuts and injuries while prepping nails or smoothing surfaces.
- Flame bits: These bits have a pointed, flame-like shape that allows precise cuticle work and under-nail cleaning.
- Mandrel bits: Mandrel bits are unique because they hold sanding bands, which work wonders for nail surface preparation and shaping.
Types Of Nail Drill Bits
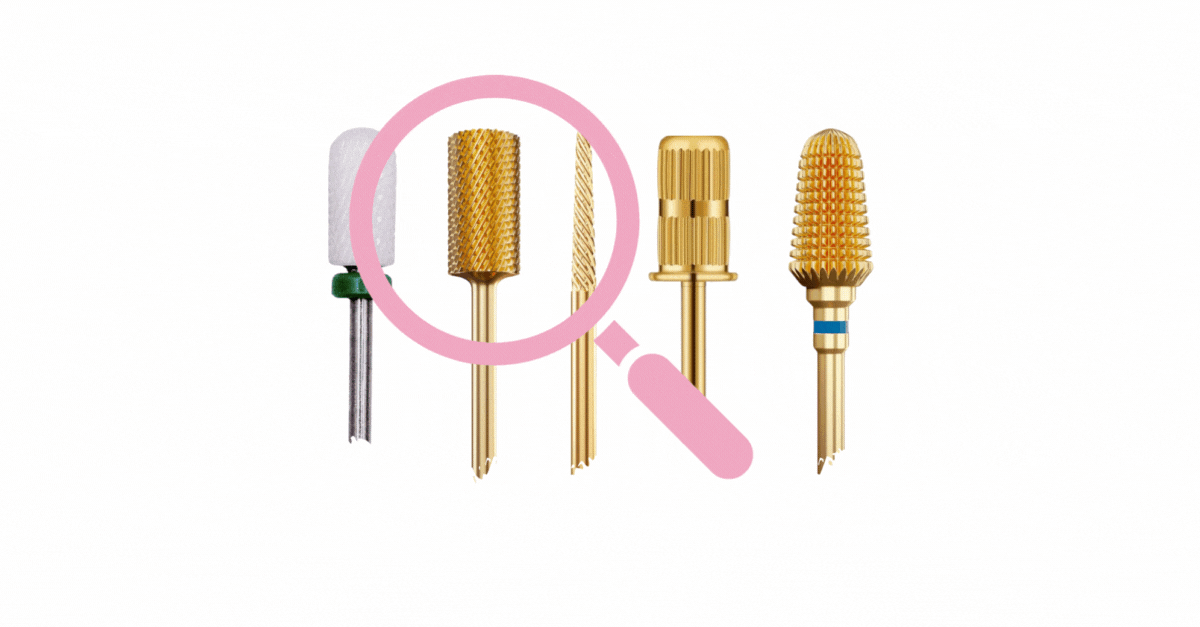
Explore a variety of nail drill bits tailored for specific tasks.
The natural nail bit is gentle and perfect for prepping natural nails before gel or acrylic application. The essential prepper bit aids in cuticle cleaning and nail surface preparation.
Mandrel bits with sanding bands refine and shape acrylic nails precisely. Small and large barrel bits efficiently shape and refine acrylics, catering to technician preferences.
Pedicure bits are go-to tools for tackling calluses and dead skin during pedicures.
Safety bits prioritize client safety in the cuticle area, while backfill bits maintain acrylic nails with precision. Flame bits reach tight spaces for a well-maintained finish, ideal for acrylic nails and cuticles.
The 5-in-1 bit, with fine, medium, and coarse options, is a versatile time-saver for achieving the perfect finish at any speed.
To ensure you deliver nothing but the best manicures, remember to choose the right grit for the task at hand.
Protip: Stick to coarse grits for shaping and heavy work, and switch to medium grits for prep and cuticle tasks, while reserving fine grits for the finishing touches.
Want in-depth knowledge of drill bits?
Here’s a comprehensive article about nail drill bits that you need to know.
How To Insert Nail Drill Bits
Before we learn the step-by-step possess, let’s know first how to put a nail drill bit in a nail drill machine.
Inserting a nail drill bit is straightforward process.
First, press and hold the button and turn the drill buckle clockwise. Then, select the appropriate drill bit that you will use.
Next, by counterclockwise motion, tighten the drill buckle. Release the button and rotate the dial to adjust the speed.
Now, the drill bit is in place and you can start polishing.
Here’s a speedy video demo to show you how to insert a nail drill bit.
Now, the nail drill bit is in place. Let’s start it running!
How to Use Nail Drill Bits
Step-By-Step Guide on How to Use Nail Drill Bits
- Select the right nail drill bit: Ensure that the drill bit you choose is compatible with your nail drill’s handpiece.
Nail bits come in different sizes and shapes, depending on your needs and your nail drill’s specifications. Standard nail bit sizes are 3/32″ and 1/8″.
- Attach the nail bit: Insert your chosen nail bit into the hand piece of your nail drill. Make sure it is secure and locked in place.
- Choose the appropriate speed: Nail drills have variable speed settings, and it’s crucial to select a speed appropriate for filing, shaping, or polishing your nails.
Beginners should start with a low to medium speed and gradually increase as they gain confidence and experience.
- Hold your hand steady: To avoid slips that could cause injury, maintain a steady grip on your hand piece while working on your nails or a client’s nails.
- File according to nail type: When working with different nail types, such as natural nails, acrylic nails, or gel polish, use appropriate filing techniques.
For example, use a gentle filing speed and pressure for natural nails. For acrylic nails, a higher speed and firmer pressure may be needed.
How To Change Nail Drill Bits
Most of the time, we have to change our bits based on what is needed.
Or inevitably, when it is already dull and cannot be sharpened further.
When these scenarios happen, we must change our nail drill bits.
Here’s how to do it.
First, turn off the drill. Then press and hold the button and loosen the drill bit buckle clockwise to remove the drill bit.
And that’s it! The nail drill bit is changed. Easy, right?
Here’s a quick video demo to show you how to insert, use, and change a nail drill bit.
Tips and Tricks for Using Nail Drill Bits Effectively
- Keep your tools clean: Regularly clean and sanitize your nail bits and hand piece for proper hygiene and to ensure efficient performance.
- Choose the right bit for the task: Different nail bits are designed for specific tasks, like removing cuticle, shaping nails, or removing gel polish. Familiarize yourself with the various types of nail bits to get the best results.
- Practice makes perfect: Using a nail drill takes practice and patience. As a beginner, it’s essential to practice on nail tips or swatches before working on real nails.
Safety Precautions to Keep in Mind While Using Nail Drill Bits

- Inspect your bits: Regularly check the status of your nail bits. If you find any cracks or damage, replace them immediately.
- Use a safety bit: A safety bit has a rounded edge to minimize the risk of cutting the skin a round the nail. This is especially important when working near the cuticle area.
- Be mindful of heat: Filing f or too long in one spot can generate heat and cause discomfort. Be cautious when using high-speed settings, and keep your filing motion consistent to avoid overheating.
- Wear protective gear: Wearing a mask and gloves can protect you from dust and allergens produced during the nail filing process. Encourage your clients to wear a mask as well for added safety.
With these tips and precautions, you’ll be well on your way to mastering the art of using nail drill bits in your manicures.
Remember, practice makes perfect, so keep honing your skills to provide top-notch nail services with your drill.
Frequently Asked Questions

What’s The Secret To Prepping Natural Nails With A Drill Without Causing Damage?
Gentleness is key when prepping natural nails with a nail drill. Start by selecting a fine-grit bit to ensure minimal damage to the nail surface.
Hold the drill at a low to medium speed and make sure to keep your hand steady while filing. Finally, remember to move the drill in one direction only and avoid applying too much pressure.
Can You Give Me A Rundown On Using A Nail Drill For The Perfect Gel Manicure?
Sure! A nail drill can be a game-changer for achieving a flawless gel manicure. Begin by buffing the nail surface with a fine-grit bit to create a smooth foundation.
Next, apply a gel base coat and cure under an LED or UV lamp. Continue layering gel polish, curing each layer, until you achieve your desired opacity. To finalize, use the nail drill to clean up any uneven edges and apply a gel top coat.
What’s The Best Way To Assemble My Nail Drill Before I Start A Manicure?
Proper assembly of your nail drill ensures a smooth and safe manicure session. First, make sure your drill is turned off.
Then, select the desired bit and insert it into the handpiece. Tighten the chuck to secure the bit in place. Finally, plug in your nail drill, turn it on, and adjust the speed according to your needs.
How Can I Skillfully Use A Nail Drill On My Toes Without Any Oops Moments?
Using a nail drill on your toes requires similar care and precision as when working on your hands. To ensure you avoid any mishaps, follow these tips:
- Choose an appropriate bit, depending on your goal (shaping nails, removing cuticles, or buffing).
- Maintain a steady hand, applying gentle pressure while using the drill.
- Keep your foot on a stable surface for better control and visibility.
- Turn the drill on and adjust the speed accordingly.
Looking To Master The Dip Powder Look; How Should I Wield My Nail Drill?
The nail drill is an essential tool for perfecting the dip powder technique. Start by prepping your nails using a fine-grit bit to shape, buff the surface, and remove cuticles.
After applying the dip powder, use a medium or coarse bit to even out any lumps or bumps. Finish by buffing and shaping your nails to perfection.
Which Nail Drill Bit Should I Choose To Safely Bid Farewell To My Acrylics?
Removing acrylics with a nail drill requires patience and the right bit. Choose a carbide nail drill bit, which is specifically designed for quickly and efficiently removing acrylics without damaging your natural nails.
Start filing carefully and slowly, taking off thin layers of acrylic until you reach your natural nail. Remember not to apply too much pressure or file too quickly, as this can cause damage to your nails.
Final Thoughts

As a nail tech, mastering nail care means knowing how to use nail drill bits.
Practice makes perfect, boosting your confidence with each use.
Stay in the loop on the latest nail drill bit innovations and share your thoughts below or on social media.
Let’s keep the nail talk going – your experiences and tips might just be what someone else needs!
