Having a diverse set of drill bit sizes in your toolkit enhances your service range, addressing individual client needs effortlessly. Versatility is paramount in this industry. The right drill bit transforms a basic manicure into a masterpiece, setting you apart as a nail technician.
Knowing the size of your nail drill bit is like having the secret recipe to a perfect manicure.

But figuring it out can feel like you’re decoding the Da Vinci Code.
But don’t worry! Here is your step-by-step guide to on how to tell what size drill bits for nail machine.
Understanding Nail Drill Bits

Nail drill bits are the unsung heroes of nail care. These essential tools can make or break your nail game.
So, what exactly are they?
Nail drill bits are used to shape, buff, and clean nails.
They’ve come a long way since their inception, evolving from simple manual files to versatile, machine-operated tools.
To learn more about drill bits, here’s an article that will help you know nail drill bits more.
Different Strokes for Different Folks: Types of Nail Drill Bits
There’s no one-size-fits-all approach when it comes to nail drill bits. Each type has a specific purpose, and knowing when to use them is the key to a flawless finish.
Materials of Nail Drill Bits
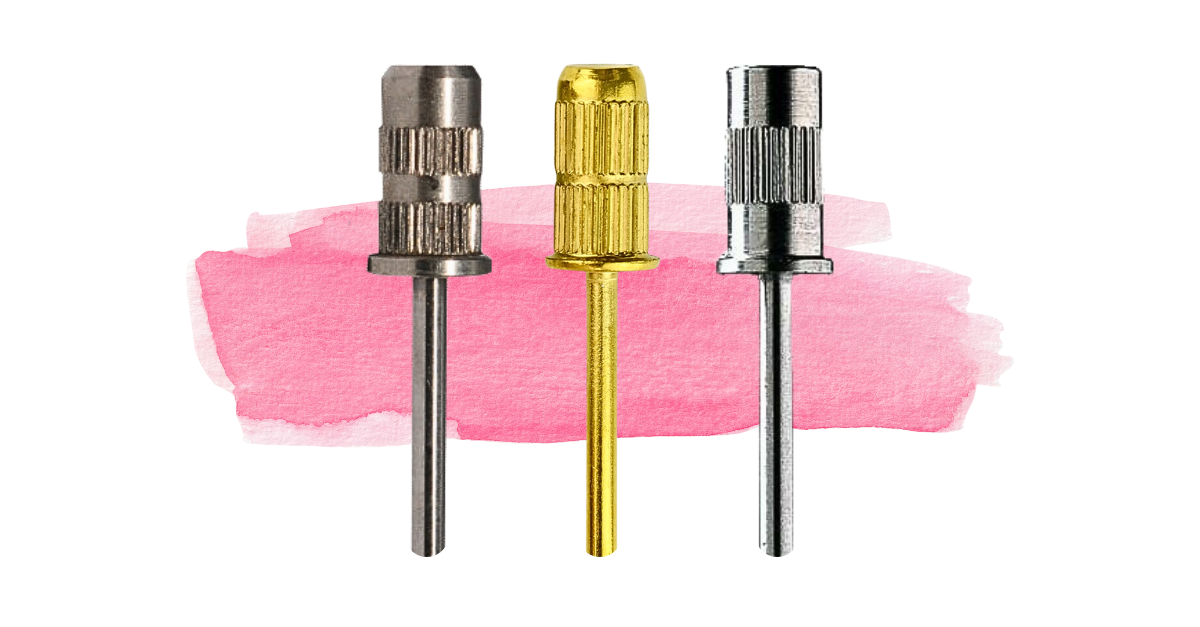
Mandrel Bits & Sanding Bands: Disposable but Indispensable
Mandrel bits and sanding bands are your go-to tools for basic nail prep. They’re perfect for removing gel polish and reducing length.
Remember though, hygiene is paramount, so always use a new band for each client.
Gold/Silver Carbide Bits: The Midas Touch
Gold and silver carbide bits are the multifunctional workhorses of the nail world.
Their role? Everything from shaping nails to removing dead skin. The size of the flute cuts on these bits determines their grit and use.
Ceramic Bits: Keeping Cool Under Pressure
Ceramic bits are praised for their heat reduction capabilities. Less heat means more comfortable clients and happy clients mean repeat business.
Shapes Matter: Getting Into the Groove with Nail Drill Bits
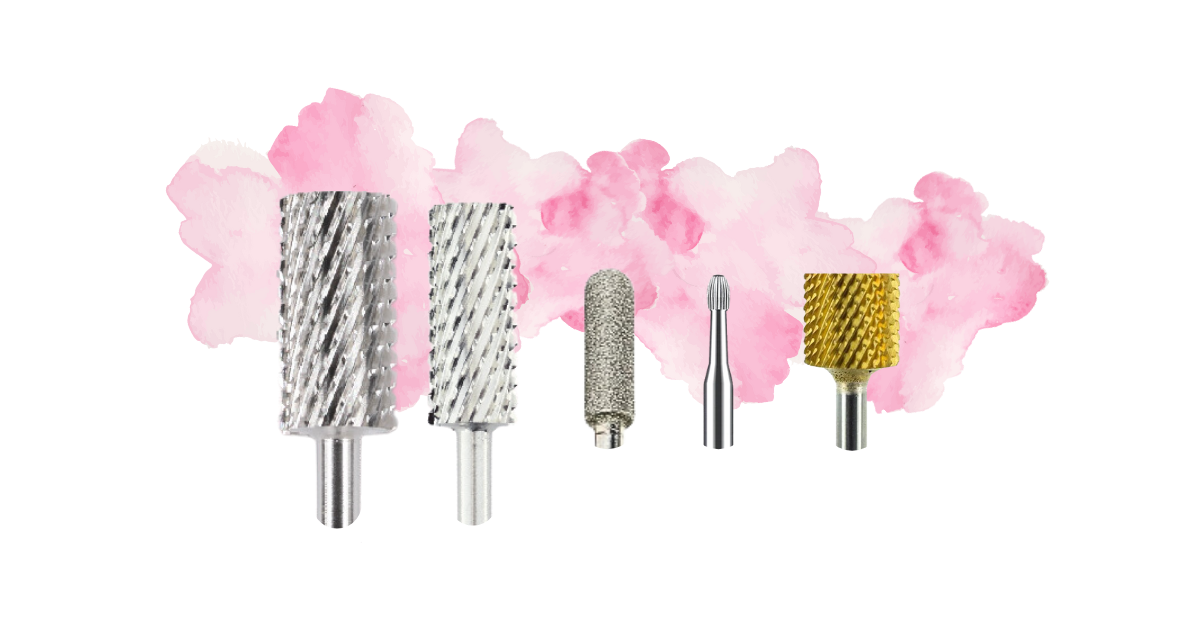
Each nail drill bit shape has its specialty. Large and small barrel bits are your all-rounders, great for surface work and shortening nails.
Pedicure bits are, unsurprisingly, perfect for pedicures, while safety bits are ideal for preparing the artificial nail.
And the Backfill bits? They’re the secret to achieving the perfect cuticle line.
Large and Small Barrel Bits: The Versatile Duo
When it comes to nail drill bits, large and small barrel bits are the jack-of-all-trades.
These bits are your go-to for a variety of tasks. Need to work on the surface of a nail?
Grab a barrel bit. Is the nail a bit too long? Barrel bits save the day again by shortening it.
They’re the all-rounders of the nail world, capable of handling a multitude of tasks with ease.
Pedicure Bits: Pedicure Perfection
It’s no secret that the perfect pedicure requires the right tools.
Enter: Pedicure Bits.
As their name suggests, these bits are designed specifically for pedicures. They’re the stars of the show when it comes to polishing those toenails and ensuring your clients’ feet look and feel their best.
Safety Bits: Nail Prep Ninjas
Next up, we have safety bits. These are your go-to bits when preparing artificial nails.
Their rounded tip and smooth edges make them less likely to cut the skin, ensuring a safer and more comfortable experience for your clients.
Remember, nail care is as much about safety as it is about style.
Backfill Bits: The Cuticle Line Champions
Last but definitely not least, we have backfill bits. These handy little tools are your secret weapon for achieving the perfect cuticle line.
With their unique shape, they allow precision work around the cuticle area, giving you a clean and professional result every time.
Why the Size of the Drill Bit Matters

Imagine preparing a gourmet meal with only a butter knife. Sure, you could eventually get the job done, but it would take forever, and the result might not be as great.
The same principle applies to nail drills.
The size of the drill bit is paramount for several reasons. Firstly, it determines the preciseness of your work.
A bit that’s too large can damage the nail or even hurt your client, while one that’s too small might not be effective.
Secondly, the right size drill bit ensures efficiency. In our industry, time is money. If you’re spending additional time correcting errors made by a wrongly sized bit, you’re essentially cutting into your profits.
How to Determine the Size of Nail Drill Bits

Just like Cinderella’s glass slipper, the size of the drill bit has to be just right.
Using the wrong size can lead to a whole host of problems, from discomfort for your client to a less-than-perfect finish.
Practical Steps: How To Tell What Size Drill Bits For Nail Machine
Now that you know what to consider, let’s dive into the steps of picking the right nail drill bit.
1. Identify the Nail Type: As mentioned, the type of nail is crucial. Natural nails will need a softer touch than artificial ones.
2. Define the Design: Once you know what design your client has in mind, you can determine what size and type of bit you’ll need.
3. Test Different Sizes: Don’t shy away from experimenting with different sizes. With time, you’ll get the hang of which sizes work best for different tasks.
Now that we’ve covered the basics, let’s dive into a step-by-step tutorial on how to choose the right size nail drill bit.
Step 1: Assess Your Nail Type – As we touched on earlier, understanding your nail type is critical. So, take a good look at your nails and make a note of their characteristics.
Step 2: Visualize Your Desired Nail Design – Picture the final result you’re aiming for. This will guide your choice of nail drill bit size.
Step 3: Choose the Right Bit Size – Based on your nail type and design, pick a nail drill bit size that suits both these aspects.
And remember, practice makes perfect. Don’t be afraid to experiment with different sizes until you find the one that works best for you.
Tips and Tricks When Choosing Nail Drill Bit Size
Now that you’re armed with the basics, how about we sprinkle some magic dust on top? Here are a few tips and tricks to help you make the right choice:
1. Always start with a smaller bit size: It’s easier to gradually increase the size if needed, rather than starting too large and risking nail damage.
2. Experiment with different bit sizes: Each nail might require a slightly different bit size. Don’t be afraid to mix things up.
3. Keep safety in mind: Always prioritize the health of your nails over the design. If a specific bit size is causing discomfort or damage, switch immediately.
With these tips, you’re now ready to conquer the world of nail drill bit sizes.
Cracking the Color Code: Color Coding of Nail Drill Bits
Now that we’ve got the sizing down, let’s address the elephant in the room: what’s up with all those colors?
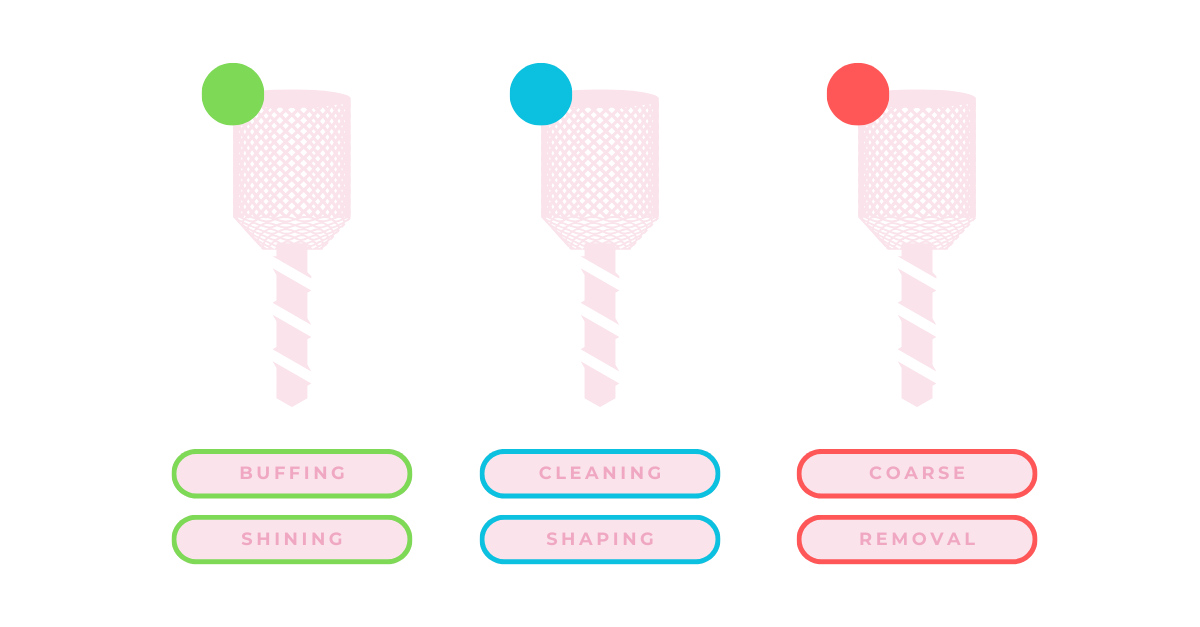
Here’s the deal: nail drill bit manufacturers use color coding to indicate the grit size (i.e., how coarse or fine the bit is). This system is your roadmap to the perfect bit.
For instance, green bits are typically super fine, perfect for buffing and shining. Blue bits, on the other hand, are fine and great for cleaning cuticles and shaping nails.
Red and yellow bits are coarse and extra coarse, respectively, and are your go-to for removing hard gel and acrylics.
Now, isn’t that a rainbow of knowledge? Keep this color guide handy, and you’ll never be at a loss when choosing the right nail drill bit again!
Remember, as nail technicians, we’re not just beautifying nails, we’re also ensuring the comfort and safety of our clients. So let’s do it right, one drill bit at a time!
The Perfect Match: Bit Size and Nail Machine
Now, let’s talk about compatibility. Your drill bit size needs to match your nail machine’s collet size.
A mismatch can lead to wobbly bits and uneven filing, and we all know that uneven nails are a big no-no in our industry.
So, always double-check the specifications of your nail machine and ensure your drill bit fits perfectly.
Final Thoughts

Mastering the selection of the right drill bit size is a crucial step in this process.
Keep refining your skills, stay curious, and, ultimately, focus on delivering perfection to your clients’ nails.
Comment below if you found this tip helpful or share it on social media to help fellow nail technicians!
