Acrylic nails are one of the most popular beauty treatments in the industry. You can treat yourself to a trip to your local salon or give yourself an at-home treatment. Your nails are a way to add a little personality to your look, whether it’s wearing your favorite color or choosing a design that speaks to your aesthetic. Acrylic nails are a little more complicated than your traditional manicure. We’re running you through everything you need to know, including how to remove acrylic nails. Before we get into how to remove Acrylic Nails, let’s talk about what they are! If you’re in a hurry, go ahead and skip the intro and scroll down!
What are Acrylic Nails?

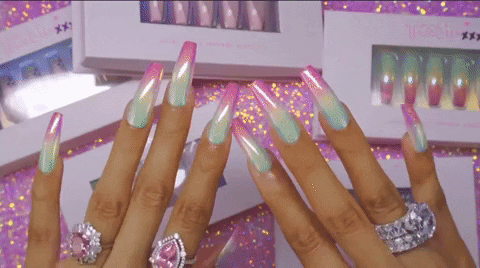
If you’ve ever taken a scroll through Instagram, you’ll have seen hundreds of celebrities and influencers showing off their fresh acrylic nails. These nails add length and style, giving you an even shape that is perfect for being inventive and incorporating fun and whimsical designs. Everyone from Billie Eilish to Kylie Jenner and Cardi B are synonymous with their skyscraper acrylics that they’re never seen without. These nail extensions give your instant length and strengthen your nails, allowing you to be inventive with their design and shape.

Acrylic nails are made using a mixture of liquid monomer and powder polymer, which create a paste that bonds to your natural nails. The mixture can be used to create any desired shape, with the formula hardening to add extra strength and thickness to your nails. If you’re someone who loves the look of long nails but struggles to grow your natural nails, acrylics will be right up your street.
How are Acrylic Nails Different?
Acrylic nails are often compared to gel nails as they both strengthen your natural nails by adding an extra layer. Compared to gel, acrylics are stronger as it makes the nails more durable. If you’re looking for length, the best option is always going to be acrylic nails. You can still get a natural look with acrylic nails by choosing a neutral shade for your polish.
Your set of acrylic nails can last between six to eight weeks, depending on the condition of your nails. You’ll also need a fill every two to three weeks, in line with your nail’s growth cycle. A fill is a touch-up to the cuticle area, where you’ll notice the first signs of growth, which is also when your acrylics can start to lift.
One of the benefits of acrylic nails is that their upkeep is minimal and they’re easy to care for. Unlike a normal manicure, you don’t have to worry about chipping, and your nails are less likely to break. While there are some steps you want to take to keep your nails healthy, the maintenance is still a lot smaller than traditional nail treatments.
When to Wear Acrylic Nails
If you’re new to the world of acrylic nails, you might be thinking of experimenting with them for a special occasion. Acrylic nails are the perfect investment before a vacation or when you have a big event on your social calendar. As they typically last for a few weeks, it’s a great opportunity to treat yourself before a special event. You won’t have to worry about your nails chipping or carrying an extra bottle of polish with you.
Choosing Your Acrylic Nails
The manicure aspect of your acrylics is where you can have fun. Don’t be afraid to experiment and go outside your comfort zone, especially if the rest of your style is minimalistic. If you don’t have a design in mind, your nail technician will help suggest a few popular options. You might find a style on Instagram or Twitter that you fall in love with. Bring along a few references photos to your appointment to help your nail technician recreate the look. There is no shortage of inspiration online for your first set of acrylic nails. We would recommend checking Pinterest for some ideas!
Along with the colour and design, you want to consider the shape and length. An oval shape is perfect for beginners as it’s the most common style. Another popular shape is the coffin-inspired nails, which are popular amongst celebrities like the Kardashian-Jenner sisters. If it’s your first time getting acrylic nails, it’s always best to go with a shorter length. You can start increasing the length with every appointment until you find a comfortable shape and length that suits your lifestyle.
How to Remove Acrylic Nails
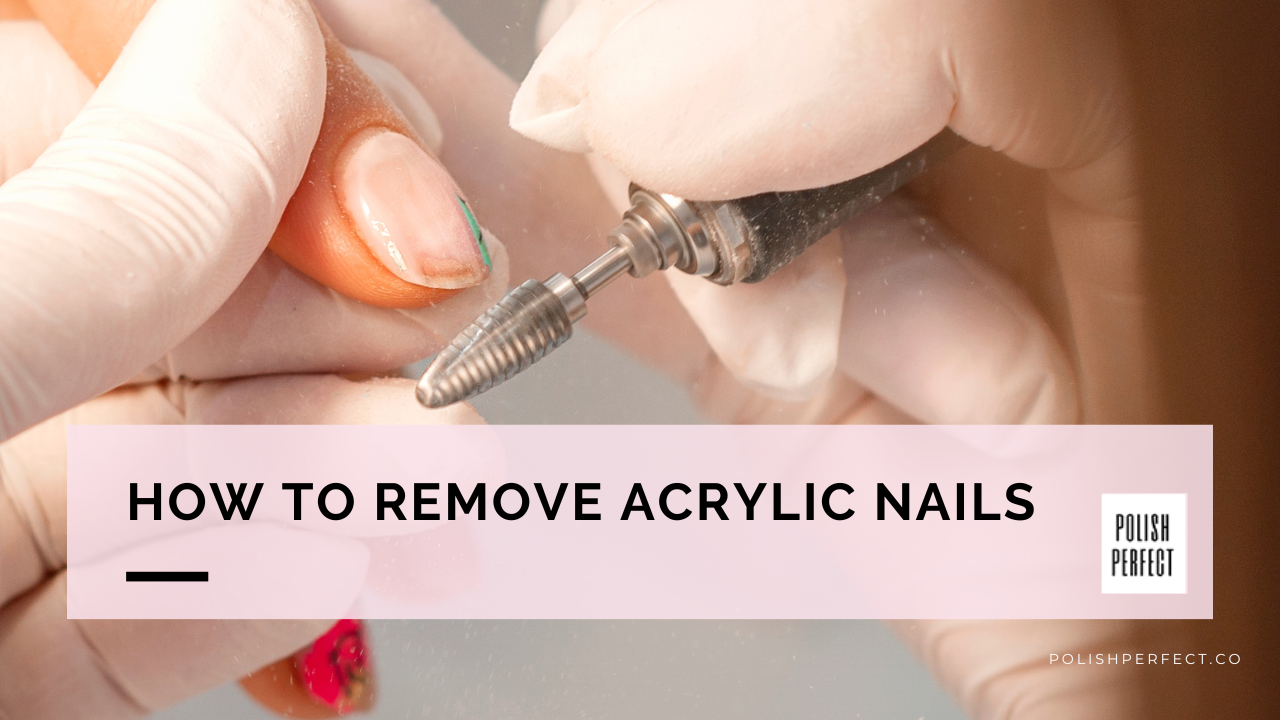
The most important aspect of acrylic nails is knowing how to remove them. If you can remove them properly, it won’t cause any permanent damage to your nails or weaken them. For this reason, we’re don’t usually recommend removing your acrylic nails at home. The worse thing you can do is pluck your acrylics off yourself. The safest way to remove acrylic nails is to go and see your nail technician. If you try to remove them yourself, you can easily damage the nail bed and cause permanent damage.
A professional nail technician will remove your acrylics using an electric file that takes off the top layer. Once this layer has been safely removed, your nails are wrapped with foil that contains an acetone-filled fabric. It takes around 15 minutes for this solution to soak into your nails. Once the foils are removed, your technician will use a cuticle pusher to take off any remaining acrylic. The final step is to use a cuticle oil to give your nails a nourishing boost of hydration to keep them healthy. Having your acrylics properly removed will help keep your natural nails intact.
Every salon and nail technician has their own method for how to remove acrylic nails. If your nails are particularly brittle and weak, then it’s worth asking about their removal process before booking. Some technicians prefer to soak each nail in an acetone solution for 30 minutes to break down the acrylics.
Another reason you want to go to a professional to have your acrylics removed is that they’ll use sterilised tools. You won’t have to worry about any nasty infections, and you can be sure your natural nails will be in safe hands.
How to Remove Acrylic Nails at Home
Unfortunately, there may be circumstances where you have to take off remove your acrylic nails at home. The global pandemic and various lockdowns have led to nail salons closing their doors to the public. If you find yourself unable to see your nail technician, you’ll still need to get your acrylics removed at the right time. While it’s not the best thing for your nails, there are ways for you to safely remove your acrylics at home.
To remove your acrylic nails at home, you need to have the following on hand (ALSO TOP RECOMMENDATED PRODUCTS):
- Pronto-100-Pure-Acetone
- Nail File
- If you are a bit more advance, you can opt out for a Electric Nail File. We talk about it quite a bit in our article and choosing the best one! Check out the article here!
- Cuticle Pusher
- Nail Strengthener
- Cuticle oil
Start by removing the acrylics using a 100% acetone solution to soak your nails in. It’s easiest to pour some of the solution into a bowl and place your fingers into the solution. Alternatively, you can soak the solution up with cotton pads and wrap them around your nails for 15-20 minutes.
Once your nails are out of the acetone, take the cuticle pusher to remove any excess formula that is still on your nails. It’s also worth investing in a nail file to have in your general makeup bag to look after your nails between treatments.
After removing the acrylics with the acetone solution, you want to clean up your nails using the nail file. You can neaten up the edges and buff out any chips in your nail beds. As your nails will be a little brittle, you want to invest in a crystal nail file, which will be gentler on the nail beds and prevent any damage.
Now that your nails are clean, you want to give them some TLC with a nail strengthener. Topping up your nails with a nail strengthener will give your natural nails some extra support. You want to look for a formula like the OPI ‘Nail Envy Nail Strengthener Bubble Bath’, which contains calcium and hydrolyzed wheat protein to help repair your nails and prevent future damage.
The cuticle oil is an essential part of your nail’s aftercare. You’ll want to keep this on hand to apply to your nails whenever you get an opportunity, but it’s also essential to add it after removing your nails. Keep an eye out for natural formulas that contain a stronger percentage of essential oils for the best results. You can also look for cuticle oils that include jojoba oil to condition your nails.
An optional step that you can consider adding is a hand mask. These are relatively affordable and a great way to look after your skin. Acetone can be harsh on your skin if you come into direct contact with it, so you want to give your skin an extra boost of moisture. It’s also a good idea to keep a hand cream in your handbag and regularly reapply it throughout the day to prevent your skin from drying out.
How to Care for Acrylic Nails
If you’re planning to add acrylic nails as a regular part of your routine, you want to give your nails some breathing time between appointments. Some people choose to book in for acrylics as often as every two to three weeks. If you fall into this category, you want to take a break after every three to six months of wearing acrylics. This short break will give your nails time to rejuvenate and aid the growth cycle. After you completely soak off your acrylics to give them some time to breathe, you want to have an IBX treatment to help strengthen the top layer of your nail bed.
When you’re wearing acrylic nails, you can still go about your normal activities. If you’re planning to do any cleaning or washing-up, it’s a good idea to wear a pair of gloves. Avoid keeping your hands under water for long periods, including when you’re washing your hair.
You should take extra care to give your hands and nails some TLC. Invest in a cuticle oil and a hand cream that you can apply to keep your skin hydrated. Keep both of them in your handbag and apply them whenever you get a free moment. Cuticle oil especially will be your nail’s new BFF.
Before your first set of acrylic nails, you want to make sure your natural nails are in a healthy condition and able to deal with the acrylic solution. Give your nails a pick-me-up by applying a nail strengthener, such as jojoba oil, which will fully absorb into your nails.
Booking Your Acrylic Nails Appointment
When booking your appointment, you want to do as much research about salons as possible. Look around online for reviews and ask your friends and family for recommendations. Nail salons should have an online portfolio that you can view, either on their website or social media, to give you an idea of their work. You want to find a nail technician that you can trust to look after your nails and properly apply your acrylics.
If you’re thinking of making acrylic nails your signature, you want to build a relationship with your nail tech. The best way to look after your nails is to keep up regular appointments and resist the temptation to wear your acrylics for as long as possible.
You might have your heart set on a certain design or look. If you have something in mind, it’s always best to run it past the nail technician or salon before making your appointment. Not every technician will offer every shade or design, especially if it requires additional products.
We hope this article has given you a rundown of everything you need to know about acrylic nails. They’re a relatively low maintenance way of achieving long, beautiful nails that will make a statement. Whether you like to keep them understated with a French polish or think outside the box with an innovative design, acrylic nails are for everyone. If you’re going for your first acrylic nail appointment, keep it short and simple. Don’t forget our after-care tips, and make sure to book in for regular treatments and in-fills.
