In crimping your brush, you need a reliable plier. Secure it firmly in your dominant hand to maintain complete control. You’ll want to avoid any mishaps that might cause your brush to slip from your grasp during the precise crimping process.
Ready to up your nail art game?

Learn how to crimp your acrylic nail brush for precision and style.
Whether you’re a newbie or a pro, this technique boosts your control and maintenance.
Dive into the full article to explore crimped acrylic nail brushes and elevate your nail game.
What Is Acrylic Brush Crimping?

Crimping is a technique used in nail care to shape and maintain the optimal condition of an acrylic nail brush.
This process involves pinching and pressing the brush hairs together to create a flat, precise working surface.
By understanding the crimping basics and investing in proper brush care, you can achieve salon-worthy results in any setting.
What Is A Crimped Acrylic Nail Brush?
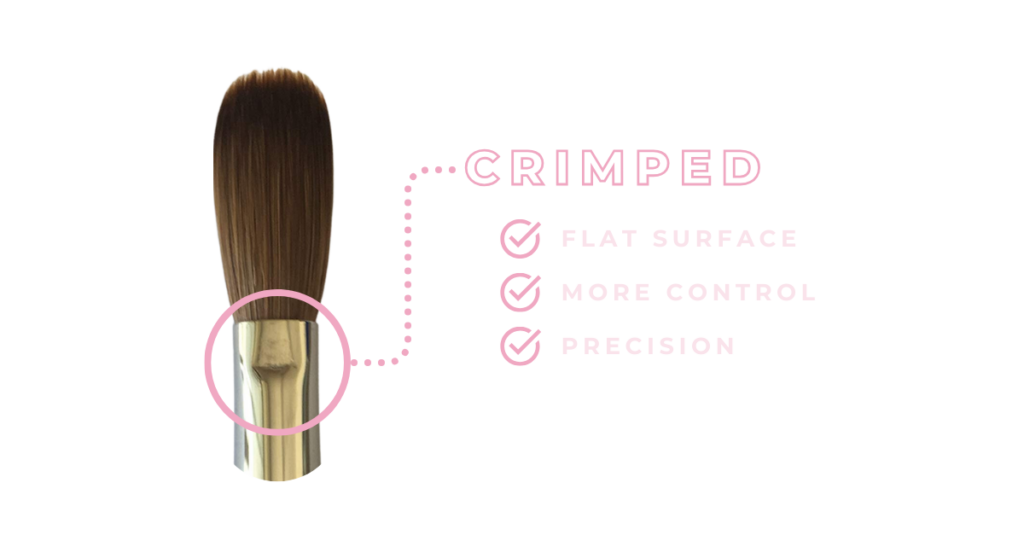
A crimped acrylic nail brush is one that has undergone the crimping process.
It typically has a flat, even surface that allows for more control and precision when applying acrylic powder to nails.
Crimped brushes are a popular choice among nail technicians and DIY enthusiasts, as they help create flawless nail enhancements.
From the popular Kolinsky hair bristles to the affordable synthetic options, the right brush can enhance your acrylic application experience, making it less of a chore and more of an art.
Why Crimp Your Acrylic Nail Brush?

Crimping your acrylic nail brush comes with several benefits:
1. Enhanced Precision
A crimped acrylic nail brush enables greater control over the application of acrylic powder, making it easier to create intricate designs and achieve a professional finish.
2. Improved Maintenance
Regularly crimping your brush helps maintain its shape and functionality, ensuring that it lasts longer and performs consistently.
3. Easier Application
A flat, crimped brush head makes it simpler to pick up and manipulate acrylic powder, creating a smoother, more even nail enhancement.
How To Crimp Acrylic Nail Brushes?
Crimping an acrylic nail brush is an essential step for achieving that perfect flat look in your nail designs. Before you begin, gather the essential items required for crimping:
What You Will Need
- A new acrylic nail brush
- A brush cleaner or monomer to remove residue
- A towel or paper towel for wiping
- A pair of pliers
The Crimping Process: Step-by-Step Guide
Now, we know the basics and we have the materials that we will need to start the crimping
Without further ado, here is our step-by-step guide.
Step 1: Brush Preparation
This ensures that your brush is clean and ready for optimal use. If you’re using a new brush, follow a guide on how to prep new acrylic brushes for the best results.
Step 2: Identify the Natural Flat Look
Identify the natural flat look or the side of the brush where the bristles are already laying flat. This is crucial because it will determine the perfect angle for crimping, ensuring your brush stays in shape.
Step 3: Firmly Grasp the Flier
Hold the plier with one hand and the brush with the other. Make sure your grip on the plier is firm but not too tight.
You’ll want to have control over the plier when applying pressure during the crimping process.
Step 4: Position the Ferrule
The ferrule is the metal piece that connects the bristles to the brush handle.
Position it between the jaws of the plier, aligning it with the natural flat look. Ensure that the plier is gripping the ferrule securely before proceeding.
Step 5: Apply Pressure and Start Crimping
Once the ferrule is in place, apply gentle pressure using the plier. Keep an eye on the bristle alignment, and make sure they maintain their flat look during the crimping process.
Gradually increase the pressure until the ferrule is crimped to your desired shape.
Step 6: Check and Repeat if Necessary
After crimping, assess the brush for the desired shape and alignment.
If the bristles aren’t perfectly flat or if the ferrule wasn’t crimped effectively, you may need to repeat the process.
Adjust your grip on the plier or the placement of the ferrule as needed before crimping again.
For an actual demo of the crimping process, you can watch the video below.
Should You Crimp Your Acrylic Brush?
As a nail enthusiast or nail technician, crimping your acrylic brush can be an essential part of your nail care routine.
Here are the factors to consider before crimping include:
- The specific brush you’re using: Some brushes may not be suitable for crimping based on their design or materials, so it is important to choose the right type of brush.
- Your level of expertise: If you’re a beginner in the world of nail art and acrylic applications, it might be helpful to learn more about the different types of brushes and their usage before attempting to crimp your brush.
- Regular maintenance: Crimping is just one aspect of brush care. It’s also essential to clean and prep your brush properly, as well as master the art of acrylic application.
Crimping can be a valuable addition to your nail care toolkit. By understanding its purpose and learning how to do it correctly, you can enhance your acrylic nail art skills and create stunning results.
(Learn more about Crimped Vs. Uncrimped here).
Acrylic Brush Types: What Shape is Best?
So, you’re searching for the perfect acrylic nail brush to create some flawless nail art. But which shape should you go for?
When it comes to crimped acrylic nail brushes, there are several shapes to choose from, each serving a different purpose.
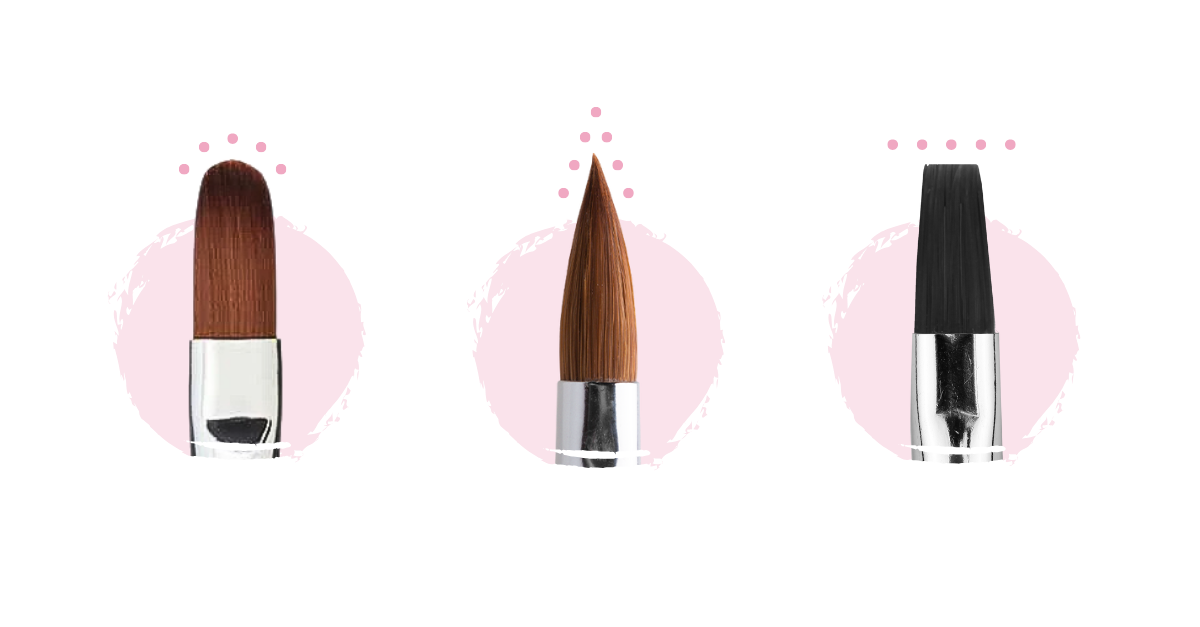
The three most common types: are round, flat, and oval acrylic brushes.
Each shape has its own set of advantages, and it’s all about finding the one that best suits your needs and working style.
You can check out our comprehensive article on acrylic brush shapes and sizes to know more which brush is best for you.
Why Choose A Crimped Brush Over A Regular Acrylic Nail Brush?

A crimped acrylic nail brush offers some distinct advantages over a regular acrylic brush.
The primary benefit lies in the brush’s design – by crimping the base of the bristles, it creates a flatter, more precise edge that allows for greater control when working with acrylic products.
This can be especially helpful when sculpting intricate designs or creating sharp smile lines.
What’s The Ideal Size For A Crimped Acrylic Nail Brush?
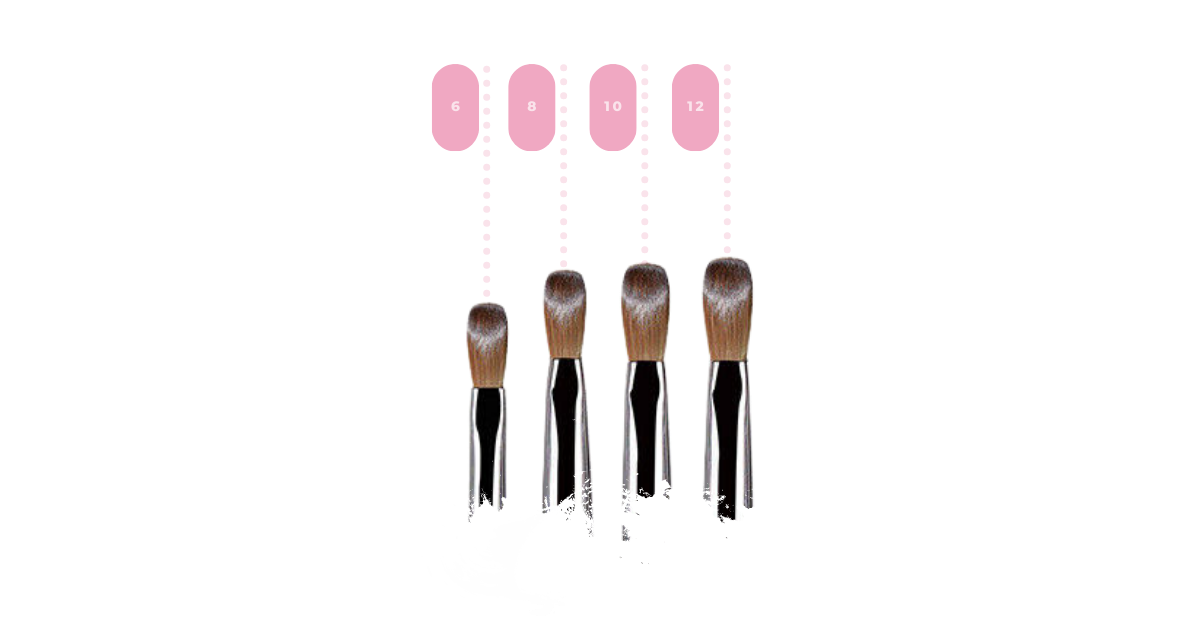
The ideal size for a crimped acrylic nail brush depends on your preference and the specific application.
Beginners often benefit from starting with a size 6 to 12 brush, as these sizes provide good control and versatility.
As you become more experienced and comfortable with your techniques, you may prefer to explore other size options that best suit your style.
Converting Round Brush to Oval
Now, some might question the need to change a round brush into an oval shape. After all, can’t we just buy an oval brush?
Well, that’s true, but there’s a certain level of satisfaction and control that comes with customizing your tools.
Plus, having the skill to reshape your brushes can save you a pretty penny in the long run. Here are the two methods to transform your round brush into an oval:
1. Temporary Method
Sometimes, you might need an oval-shaped brush for better control and to create detailed nail art designs.
Here’s a quick and easy method to temporarily convert your round brush to an oval shape. Grab your round acrylic nail brush and a pair of pliers to get started!
- Hold the brush: Firmly grip the brush’s ferrule (the metal part) with the pliers.
- Gently squeeze: Slightly apply pressure to flatten the bristles with the pliers. Be careful not to overdo it or damage it.
- Adjust the shape: Use your fingers to carefully shape the bristles into an oval form.
Voilà! You have your temporary oval brush ready for use. Keep in mind this transformation might not last long, but it’s a quick fix when you need it.
2. Permanent Method
If you’re looking for a more permanent solution, consider crimping your round acrylic nail brush.
Before beginning this process, you will need a pair of pliers, a lint-free cloth or paper towel, and some liquid monomer.
- Prep the brush: Whether you’re using a new brush or an old one, ensure it is clean and free of any residual resin.
- Soak the brush: Dip your brush into the liquid monomer, soaking the bristles entirely. You can gently press it against the side of the container to release any excess liquid.
- Crimp with pliers: Use the pliers to closely grip the ferrule while applying moderate pressure to flatten the bristles.
- Shape the bristles: As the bristles become flat, shape them into an oval form with your fingers. Hold the desired shape for a few seconds and release the pressure on the pliers.
- Clean up: Use the lint-free cloth or paper towel to absorb any leftover monomer and clean your brush.
And there you have it! Your round brush is now permanently transformed into an oval shape, giving you access to improved precision and control for those stunning acrylic nail designs.
Now, you have your crimped acrylic brush and ready to wield it. Here are some tips on how to make your nail designs more fabulous!
How To Make Your Acrylic Look Better?

Improving the look of your acrylic nails starts with choosing the right tools, and a crimped acrylic nail brush can make all the difference.
This type of brush helps create a more precise and clean design, making your nails look professionally done.
Follow these simple steps to enhance your acrylic application:
- Choose the right brush. When selecting a crimped acrylic nail brush, it’s essential to focus on the bristle quality and the handle’s comfort.
High-quality bristles, such as Kolinsky hair, will provide better control and product application, while a comfortable handle ensures a steady grip throughout the process.
- Prep your brush: Before using your new acrylic brush, make sure to clean and condition the bristles.
Soak the brush in a solution of acrylic liquid and let it sit for a few minutes. Then, take the brush out, press on the bristles to fan them out, and rotate the brush until the bristles regain their shape.
- Maintain proper brush technique: While applying the acrylic product, use a gentle touch and wrap the product around the nail instead of pressing it on top.
This approach helps avoid overexposure and leaves a smooth finish. Make sure your brush does not come in constant contact with the skin surrounding the nail plate.
Remember, practice makes perfect! With a quality crimped acrylic nail brush and these helpful tips, you’ll soon notice a significant improvement in your acrylic nail application.
Tips and Common Mistakes
Now let’s talk about some useful tips for crimping success and common mistakes you should avoid when dealing with an acrylic nail brush.
Tips for Crimping Success
- It’s essential to clean your brush before crimping. Soak the bristles in acrylic liquid before putting them in a clean, disposable bag. Gently press on the bristles to fan them out.
- To maintain your crimped brush in good condition, clean it regularly. After every use, rinse the brush with a brush cleanser to remove any residue.
- If the brush gets frayed, reshape the bristles by soaking them in brush restorer, then pressing them back into shape. Store the brush in a protective tube or case.
Common Mistakes to Avoid

- Insufficient cleaning: Not cleaning your brush properly can lead to a buildup of acrylic residue, making the bristles clump together. Use a brush cleanser or acrylic liquid to clean your brush after every use.
- Over-crimping: Crimping too tightly can damage the bristles and shorten the brush’s lifespan. Be gentle when using pliers – apply just enough pressure to flatten the bristles without causing damage.
- Incorrect brush size: Ensure you use the appropriate size brush for the nail, as using a too small or too large brush can affect your work and the brush’s condition.
- Neglecting maintenance: Regularly clean, reshape, and store your brush to maintain its quality and extend its life.
By following these tips and avoiding common mistakes, you can ensure your acrylic nail brush remains in excellent condition and delivers professional-looking results.
But what happens if your favorite acrylic nail brush is in bad shape?
Here’s what to do to rescue a frayed acrylic brush.
How Do You Fix a Frayed Acrylic Brush?

Frayed brushes can be the bane of a nail tech’s existence, resulting in uneven and messy nail art.
But fear not! With a little TLC, you can resurrect your damaged brushes.
Here’s how to breathe new life into your frayed acrylic brush:
1. Begin by bathing your brush in a cleaner specifically designed for brushes. This step will soften the bristles and cleanse away any debris.
2. Gently reshape the bristles using your fingers or a small comb. Be patient and gentle, your brush has been through a lot!
3. If necessary, use a pair of small scissors or clippers to trim away any severely frayed bristles. This is your brush’s haircut, so keep it neat!
4. Allow the brush to dry thoroughly before using it again. You wouldn’t use a wet paintbrush, would you?
Remember, regular cleaning and proper storage can work wonders in preventing fraying and extending the life of your acrylic brush.
Final Thoughts

Crimping your acrylic nail brush enhances precision and longevity, making it a must-try technique for nail enthusiasts.
Whether you’re a pro or a beginner. It’s time to enhance your nail game with crimped acrylic nail brushes.
Do you have a tip or trick that has made a big difference in your work? We’d love to hear about your nail artistry journey.
Share your thoughts in the comments section below.
If you found this article helpful, don’t forget to share it with your fellow nail technicians and beauty enthusiasts.
