Is there anything that feels better than a pedicure especially on nice acrylic toenails?
Through the years, pedicures have come a long way. From art brushes to fancy designs on acrylic toenails, the pedicure possibilities are endless today.

You probably have heard of acrylic nails, but acrylic toenails?
Why not?
Acrylic toenails are the perfect way to spice up your pedicure or to even replace or fix a missing toenail, such as an injury, an accident, or even a toenail fungus.
So, if you are embarrassed by the current condition of your feet, then why not kick your pedicure up a notch with acrylic toenails?
What Are Acrylic Toenails?

Acrylic toenails are artificial or fake nail extensions made from a mixture of liquid monomer and powdered polymer. They’re applied to the natural toenail and shaped to create a desired length and style.
Once the acrylic is set and hardened, it becomes a durable and long-lasting extension of your natural nail.
Can You Get Acrylics On Your Toes?

Absolutely! Acrylic toenails are a popular choice for those who want to enhance the appearance of their toenails. Whether you want longer, stronger nails or a fabulous pedicure that won’t chip or fade, acrylics can do the trick.
Just make sure to find a skilled and experienced nail technician who specializes in acrylic toenails to ensure the best results.
How Long Do Acrylic Toenails Last?
The lifespan of acrylic nails can vary depending on various factors, such as your nail growth rate and how well you care for them. On average, acrylic nails can last anywhere from 4 to 6 weeks before requiring a fill or maintenance appointment.
However, keep in mind that everyone’s nails are different, so it’s essential to monitor your own nails and schedule fills accordingly.
Pros and Cons of Acrylic Toenails
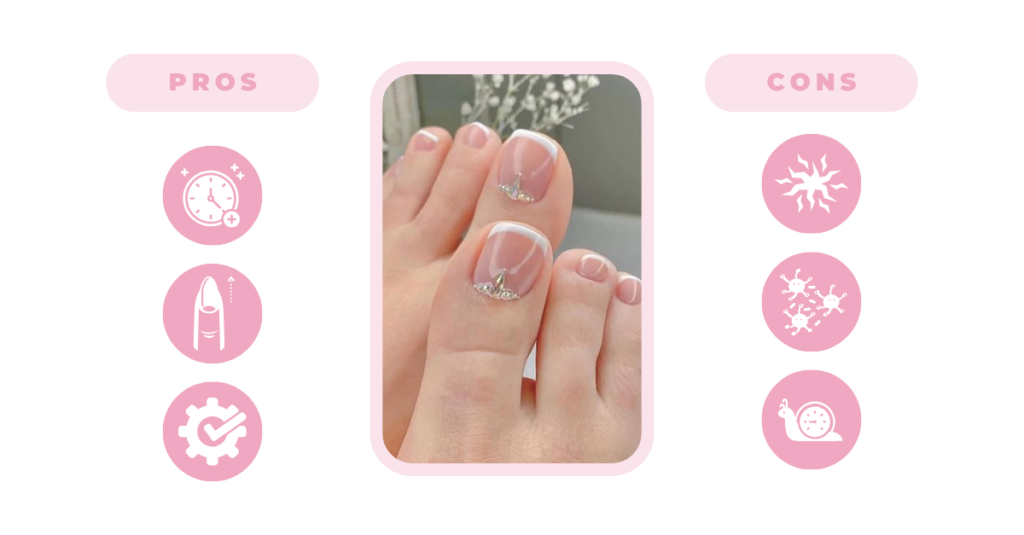
Now, let’s weigh the pros and cons of acrylic toenails to help you make an informed decision.
Pros
Longer wear time
Increased Nail Length and Strength
Customizable Designs
Cons
Potential Damage to Natural Nails
Risk of Fungal Infection
Longer Fill Sessions
Pros:
1. Longer Wear Time: Unlike regular nail polish that chips and fades within days, acrylic toenails can last for weeks, keeping your pedicure looking fresh and fabulous.
2. Increased Nail Length and Strength: If you struggle with short or weak toenails, acrylics can provide the length and strength you desire. Say hello to those open-toed shoes you’ve been dreaming of!
3. Customizable Designs: Acrylic nails offer endless design possibilities. From simple and elegant to bold and vibrant, let your creativity shine through your toes.
Cons:
1. Potential Damage to Natural Nails: Improper application or removal of acrylic nails can lead to damage and weaken your natural nails. Be sure to choose a skilled technician who prioritizes nail health.
2. Risk of Fungal Infection: If moisture gets trapped between the acrylic and your natural nail, it can create a breeding ground for nasty fungal infections. Proper hygiene and maintenance are critical in preventing this issue.
3. Longer Fill Sessions: Unlike acrylic nails for the hands, filling in acrylic toenails can be a bit more time-consuming due to the nature of the application. Be prepared for longer sessions at the salon.
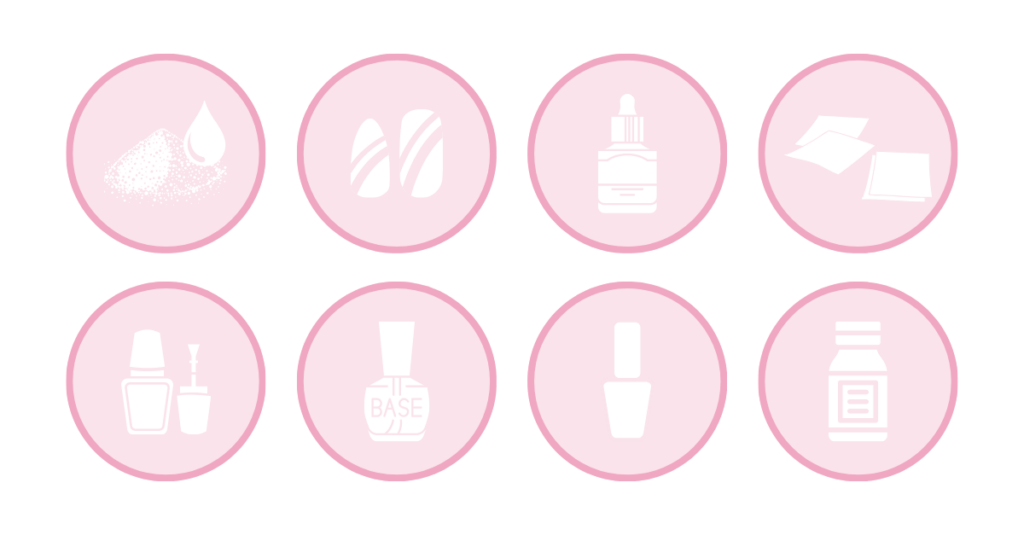
What You Need to Apply Acrylic Toenails

If you prefer to take the DIY approach to apply acrylic nails, then be sure to have these items on hand.
1. Acrylic Powder Kit – The first—and probably the most important—tool you need for your acrylic nails is an acrylic powder kit. There are a number of different acrylic powder kits available, all with different items, glues, and products.
Tip: Be sure to select an acrylic powder kit that at least includes a liquid and powder.
2. Toenails Kit – If your acrylic powder kit doesn’t come with them, you will also need a set of fake toenails.
Tip: Avoid purchasing cheap acrylic powder and toenails kits. Most cheap products will not last, do not adhere well or will even crack or break.
3. Nail Polish Remover – If your toes are currently painted, then you will need nail polish remover to remove the old polish before applying acrylic powder. The acrylic powder adheres best to naked toenail plates.
4. Nail Cleanser – Using a nail cleanser will thoroughly sanitize the toenails, preventing bacterial and fungal growth.
5. Antibacterial Hand Soap and Sanitizer – Be sure to wash your hands and feet before and after applying acrylic nails to properly rid excess chemicals.
6. Nail Glue – You will need a bottle of nail glue to adhere the fake toenails to the toenail plate.
A bottle of nail glue should come with your acrylic nails kit, but if it does not, be sure that you purchase a bottle of nail glue that is the SAME brand as your acrylic kit.
Protip: Remember, different products from different brands don’t always play nice with one another.
7. Cuticle Exfoliator – This handy tool is used to remove dried-out, rough cuticles.
8. Top Coat – Apply a top coat after you have finished applying acrylic toenails. This helps seal your acrylic nails to ensure long-lasting protection and beauty.
9. Moisturizing Lotion – Using different chemicals and products, particularly nail polish remover can dry out the skin. Don’t forget to apply a premium-quality moisturizer to your hands and feet after completing your acrylic nail transformation.
10. Nail File Kit – When doing your nails or toenails, you can never have enough files. Files come in all different sizes, shapes, and grits, which are perfect for different toenail sizes and thicknesses.
Protip: Be sure that you also have a foot file in your nail file kit. A foot file is great for not only filing toenails but also helps remove calluses and dry areas on the foot, particularly the heel.
11. Toenail Clippers – Yes, there is a difference between fingernail clippers and toenail clippers.
Toenail clippers are often stronger since toenails are often thicker than fingernails. Be sure to have a pair of toenail clippers on hand to trim toenails back, if needed.
12. Sable Brush – This is a wide-bristled, soft brush that is great for wiping away excess powder, chemicals, dust, and dry skin from your acrylic nails before painting.
This will help you to apply a smooth and clean finish.
13. Re-usable Nail Forms (Optional) – If you prefer to use nail forms instead of acrylic toenails, then be sure to have these on hand. Re-usable nail forms are great for gel, acrylic, and French manicures.
14. Cuticle Pusher – Cuticle pushers come in both steel and wood. Wooden cuticle pushers can be reused or thrown away after use. They can also be used for toenails as well as fingernails.
15. Cuticle Nippers – Although you should never cut your cuticles—even on your toes—sometimes hang nails happen, so be sure to use a pair of cuticle nippers to remove excess skin or hangnails. Steel nippers work the best!
16. Nail Machine – This handy tool helps buff out any uneven areas of the toenail after acrylic is applied and nails are filed. This also helps create a smooth finish, perfect for painting.
Most nail buffers come with four different surface areas for different uses. For example, the rougher side is great for removing bumps and scratches whereas the smoother side polishes and buffs.
17. Bond Aid – Yes, you can use nail glue as well, but bond aid is often applied to the toenails to ensure that the acrylic and fake toenails adhere well.
18. Toe Separators – If you have painted your own toenails before, then you probably already have toe separators on hand, or at least recognize them.
These little foam tools help separate the toes for painting to avoid nail polish or chemicals from smudging or getting stuck between the toes.
19. Towelettes – Finally, using moist towelettes or wipes to clean up your work area is important. You should also clean your brushes after use to sanitize them from excess chemicals so they are clean and ready for next time!
20. UV or LED Lamp (Optional) – If you prefer to use gel nail polish on your acrylic toenails, then having a UV or LED lamp to help cure gel polish can help speed up the drying process, and will also help ensure a smooth, shiny, and clean appearance.
A Step-by-Step Guide on How to Apply Acrylic Toenails

Now that you have your toolkit ready to go, it’s time to start applying acrylic toenails!
Follow these steps below to ensure the beautiful and easy application of acrylic toenails.
Step 1. Cleanse
The first step is to thoroughly wash your hands and feet to ensure that you are working with a clean area.
Many DIY-ers often skip this step, but they shouldn’t. Simply washing your hands and feet can avoid contaminating your toenails and fingernails.
It will help when applying adhesive for each acrylic toenail. Be sure to use your antibacterial hand soap during this step.
Step 2. File
Once your hands and feet have been thoroughly rinsed, cleansed, and dried, you can begin removing old nail polish (if any) and clipping and filing your toenails.
Simply use your toenail files, cuticle clippers, toenail clippers, and nail polish remover during this step. Be sure to remove any excess dried skin, hangnails, and calluses, and take the time to ensure that all of your toenails are filed to the same length.
Depending on the condition of the feet, this step may take longer than others. Be sure to be patient and ensure that the toes are clean, smooth, and filed nicely before proceeding to the next step.
Step 3. Soak
Once you have finished filing, soak your feet for a few minutes in warm water to soften the cuticles. You can soak your feet in a large bowl, a foot bath, or even the bathroom tub.
Then, using your cuticle pusher, you can push the toenail cuticles as far back as you can without causing damage or discomfort.
Step 4. Fit and Size the Toenails
Once your feet are clean and filed, it’s time to open your toenails kit and find the toenails that best fit your feet. Every toenail size and shape is different, so be sure to choose the nail that fits each toe best.
Ready to take your acrylic nail skills to the next level? Today, we’re going to walk you through the process of creating gorgeous French tip acrylic toenails. Get your tools ready because we’re about to dive in!
Protip: If you are having trouble finding a nail that fits just right, then you may need to choose a wider nail and file down the edges until it fits properly.
Taking the time to size each toenail properly will keep your acrylic toenails from breaking.
Step 5. Apply the Adhesive
Now open your acrylic powder kit. Use a small amount of acrylic adhesive on the tip of the toenail.
Use a Q-tip or tissue to wipe away excess glue and chemicals. Place the acrylic nail on the toe and hold it down for at least 10 seconds until the glue sets.
Protip: If you notice any air bubbles in the glue, then remove the nail and try again. The toenail will not adhere sufficiently if there are air bubbles. This means that there is air beneath the toenail, which means that it could pop off later.
Step 6. File Again
After you have successfully glued your toenails and applied the acrylic power, it’s time to file again.
This time, focus on smoothing any rough edges and achieving your desired toenail length. Repeat this step for the rest of your toes. Once you have finished filing, take your nail buffer and buff out your edges to achieve a smooth finish.
Step 7. Paint Your Toenails
Once you have properly filed and buffed out your nails, now it’s time for the fun part: painting and decorating! Use the polish color of your choice. You can also use a gel if you prefer.
Don’t forget to apply both a base coat and topcoat before and after painting!
Step 8. Dry
Allow sufficient time for your newly painted acrylic toenails to dry. If you use gel toenails or gel polish, you can use a UV lamp or LED lamp to cure your polish.
If you don’t have a lamp and have used regular polish, simply allow them to air dry.
Protip: Be sure that your acrylic nails are fully dry before going about your daily activities. Acrylic nails should not feel sticky!
Step 9. Moisturize
Once your toenails are completely dry, be sure to apply some moisturizing lotion to your hands and feet to ensure softness and avoid skin dryness from the use of chemicals.
Step 10. Clean Your Work Area
Now that you are completely finished and your acrylic toenails are dry, be sure to clean your work area by using moist towels or wipes, and be sure to dispose of any used waste acetone properly.
And there you have it, fellow nail techs! A step-by-step guide on applying acrylic toenails like a pro. Now, are you ready to take your acrylic nail skills to the next level?
The following sections will give you a walkthrough on French tip acrylic toenails and how to do acrylics on toes with forms or tips. Get your tools ready because we’re about to dive in!
How to Do Acrylic Toenails French Tip
Before we dive into the process, let’s make sure you have everything you need. Here are the tools you’ll require:
1. Acrylic powder and liquid
2. Nail forms or tips
3. Nail primer
4. French tip stencil (optional)
5. Sheer or nude pink polish
6. Base coat
7. Topcoat
8. Acetone (for removal)
1. Prepare Your Nails
Before applying acrylic to your toenails, it’s essential to properly prepare them. Start by removing any existing polish and filing your nails to your desired length and shape. Use a nail buffer to gently smooth the surface of your nails, creating a perfect canvas for the acrylic.
2. Care for Your Cuticles
Next, it’s time to give your cuticles some TLC. Apply cuticle oil or a cuticle softener and gently push back your cuticles using a cuticle pusher. Be careful not to cut or damage your cuticles, as they help protect your nails from infections.
3. Apply a Base Coat
To ensure your acrylic nails last longer, start by applying a thin layer of base coat to your nails. This will create a smooth surface and prevent staining.
4. Create the French Tip
Now it’s time to create the iconic French tip on your toenails. You can either use a French tip stencil or freehand it if you’re feeling confident.
Place the stencil at the desired location on your nail, leaving the tip exposed. If you’re freehanding, use a steady hand and a nail art brush to paint a clean, curved line across the tip of your nail.
5. Apply Sheer or Nude Pink Polish
Once the French tip is complete, it’s time to add some color. Apply a sheer or nude pink polish to the rest of your nail, leaving the French tip untouched. This will create a seamless gradient effect and give your toenails a natural, polished look.
6. Seal with a Top Coat
To protect your freshly painted acrylic nails and add shine, finish off with a top coat. Apply a generous layer of top coat, making sure to seal the edges of your nails. This will help prevent chipping and extend the life of your manicure.
Applying Acrylics On Toes with Forms or Tips
If you’re ready to take your acrylic nails to the next level, you can use forms or tips to create a longer and more dramatic look. Here’s how:
1. Prep the Toenails
Start by preparing your nails as mentioned earlier. Remove any existing polish, file your nails, and buff the surface.
2. Apply The Nail Primer
To ensure the acrylic adheres properly, apply a thin layer of nail primer to your toenails. This will help the acrylic bond to your natural nails and prevent lifting.
3. Apply The Tips or Nail Forms
Choose between nail forms or tips to create the desired length and shape for your acrylic toenails. Nail forms are a great option if you want a custom fit, while tips are perfect for quick and easy application.
Follow the instructions provided with the forms or tips to apply them securely to your natural nails.
4. Mix the Acrylic Powder and Liquid
Now it’s time to mix the acrylic liquid and powder. Follow the instructions on the packaging to achieve the correct consistency. Remember, practice makes perfect, so don’t be discouraged if it takes a few tries to get it right.
5. Apply the Acrylic
Using a small acrylic brush, dip it into the mixed liquid and powder and apply it to your toenails. Start from the base and gently stroke the brush towards the tip, creating a smooth and even layer of acrylic.
Repeat this process on all your toenails.
6. Shape the Acrylic
Once the acrylic is applied, you can sculpt it to create your desired shape. Use a nail file or buffer to shape the acrylic, making sure to smooth out any rough edges or uneven surfaces.
Take your time and work slowly to achieve a flawless result.
7. Allow to Dry
Give your acrylic nails some time to dry and harden. This typically takes around 10-15 minutes, depending on the brand and type of acrylic you’re using.
Be patient and avoid touching or bumping your nails during this time.
8. Shape and File
Once the acrylic is fully dry, it’s time to shape and file your toenails to perfection. Use a nail file or buffer to shape the acrylic into your desired length and shape.
Whether you prefer a square, rounded, or almond shape, make sure to file gently and evenly to avoid damaging the acrylic.
9. Finish and Polish
To complete your acrylic toenails, apply a top coat for added shine and protection. This will give your nails a glossy finish and help prevent chipping. You can also add some nail art or decorations if you’re feeling extra creative.
As a nail technician, proper application and maintenance are key to ensuring the best possible outcome for your clients. So after learning the different ways to apply acrylic on your toenails, let’s dive in on how to remove it when it’s time to go.
Steps in Removing Acrylic Toenails
When it’s time to remove your acrylic toenails, there are a few methods you can try. Here are three popular options:
Acetone Soak Method
1. Fill a bowl with acetone and soak your nails for around 15-20 minutes.
2. Gently scrape off the softened acrylic using a cuticle pusher or orangewood stick.
3. Repeat the soaking and scraping process if necessary until all the acrylic is removed.
4. Rinse your feet with warm water and apply cuticle oil to nourish your nails.
Dental Floss Method
1. Gently slide a piece of dental floss or a flosser pick under the edge of the acrylic.
2. Carefully wiggle the floss back and forth to loosen the acrylic from your natural nail.
3. Continue this process, moving along the edge of the acrylic, until it is completely removed.
4. Cleanse your nails and apply cuticle oil to moisturize.
Soak-off Acrylic Toenails Method
1. Look for a soak-off acrylic system specifically designed for easy removal.
2. Follow the instructions provided with the product to soak your nails and remove the acrylic.
3. Be patient and allow the product to work its magic.
4. Once the acrylic is softened, gently remove it using a cuticle pusher or orangewood stick.
5. Rinse your feet with warm water and apply cuticle oil to hydrate your nails.
With these methods, you can safely and effectively remove your acrylic nails at home. Remember to be gentle and take your time to avoid damaging your natural nails.
How Much Are Acrylic Toenails?
Acrylic toenails can vary in price depending on where you go and the level of expertise of the nail technician. On average, you can expect to pay between $30 and $50 for a full set of acrylic nails.
Keep in mind that this price may not include any additional services such as nail art or nail repairs, so be sure to clarify what’s included before getting your nails done.
Can I Get Acrylic On My Big Toe?
Absolutely! Acrylic toenails can be applied to any toe, including the big toe. Whether you want to add length to your big toe or simply enhance its appearance, acrylics can be a great option.
Just make sure to communicate your preferences with your nail technician so they can create the perfect look for you.
Artificial Nails For Missing Toenails
If you have missing toenails, acrylics can be a game-changer. They provide a natural-looking solution to cover up the gaps and give the illusion of complete toenails.
Your nail technician can customize the shape, length, and color of the acrylics to match your existing toenails, creating a seamless and beautiful finish.
Can You Apply Acrylics If Your Nail Is Gone?
Yes, you can still get acrylic nails even if your natural nail is completely gone. In this case, your nail technician will use a special technique called “nail bed extension” to create a base for the acrylics.
They will carefully apply the acrylic material directly to the skin, mimicking the look of a natural nail. This method can be a great option for those who have lost their toenails due to injury or medical conditions.
Pedicures With Acrylic
Getting a pedicure with acrylic toenails is a fantastic way to pamper yourself and keep your nails looking fresh. During a pedicure, your nail technician will trim, shape, and buff your acrylic toenails, as well as take care of your cuticles and moisturize your feet.
You can also choose to add nail art or a gel polish to complete your pedicure look. It’s a great opportunity to relax and give your feet the TLC they deserve.
What Length Should My Nails Be to Get Acrylics?
The length of your nails before getting acrylics is entirely up to you. Whether you prefer short and natural-looking nails or long and dramatic ones, your nail technician can customize the length to your liking.
Just keep in mind that longer nails may require more maintenance and can be more prone to breakage, so choose a length that suits your lifestyle and preferences.
Short Acrylic Toenails
Short acrylic toenails are perfect for those who prefer a more natural and low-maintenance look. They’re easy to manage and less prone to breakage compared to longer nails.
Short acrylic toenails can still be stylish and trendy, especially when paired with a fresh coat of gel polish or a minimalist nail design. Embrace your natural nail length and rock-short acrylic toenails with confidence.
Long Acrylic Toenails
On the other end of the spectrum, long acrylic toenails can be a bold and glamorous choice. They’re perfect for those who want to make a statement and showcase their unique style.
Long acrylic toenails can be customized to any shape and design you desire, allowing you to express yourself through your nail art. Just be prepared for a bit more maintenance and caution when
Acrylic Toenails Trends
Just like with any other beauty trend, acrylic toenails have their own trends that come and go. Currently, some popular trends include ombre designs, marble effects, and minimalist nail design. You can also experiment with different shapes, such as coffin, stiletto, or almond.
Don’t be afraid to get creative and try out new trends – after all, your toenails are a blank canvas waiting to be adorned!
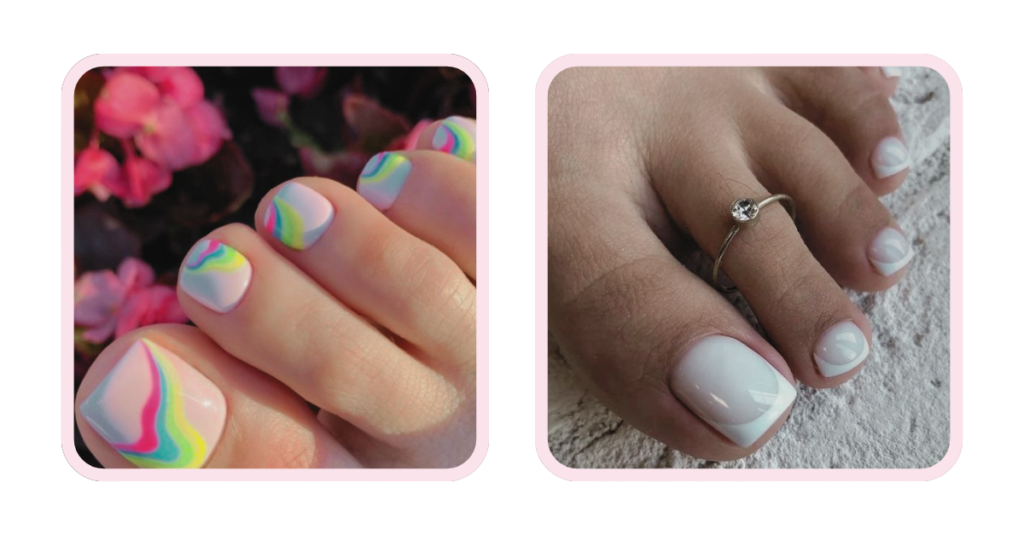
Cute Acrylic Toes
Acrylic toes can be incredibly cute and charming. From vibrant colors to adorable nail design, there are endless possibilities to make your acrylic toes look cute and fun.
Consider adding some glitter, floral designs, or even tiny animal prints to make your toes stand out. The key is to have fun and let your personality shine through your nail design.
White Acrylic Toenails
White acrylic toenails are a classic and timeless look. They exude elegance and can complement any outfit or occasion. Whether you opt for a French tip design or a solid white color, white acrylic toenails are sure to make a statement.
They’re perfect for weddings, special events, or simply when you want to add a touch of sophistication to your look.
Final Thoughts

So, there you have it: a complete step-by-step guide to applying acrylic toenails.
I hope you’ve enjoyed this tutorial on creating beautiful acrylic toenails as much as I enjoyed putting it together for you.
As someone who cherishes the power of beauty and self-expression, I find mastering this skill both rewarding and liberating. And I believe you will too—after all, your toes are an extension of your personality!
Did this guide inspire you to explore your creative side? I’d love to hear your thoughts in the comments below. If you found this article useful, please consider sharing it with others who might benefit as well.
More Related Resources:
